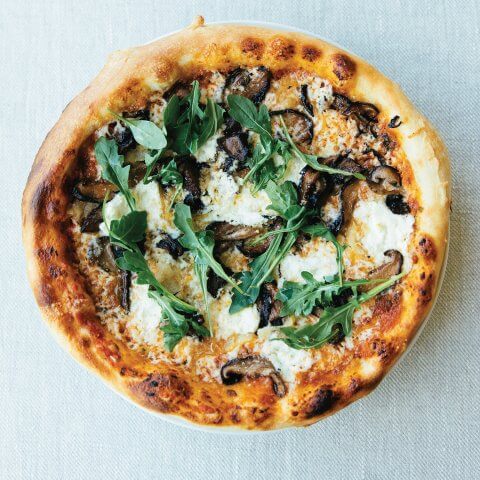
Mushroom, Caramelized Onion and Goat Cheese Pizza
Lisa Ahier's elaborate mushroom and goat cheese pizza is a huge hit in Tofino.
Ingredients
Tofino-Style Pizza Dough
- 1 cups lukewarm water (about 110°F, from the tap) plus extra as needed
- ½ tsp active dry yeast
- ¼ cup dark beer I like HoyneBrewing Co.’s Dark Matter
- 3 tbsp olive oil
- 3¾ cups 00 flour see note #1
- 3¾ cups all-purpose flour plus extra as needed
- 1½ tbsp salt
Red Sauce
- One 28oz can San Marzano tomatoes or whole plum tomatoes
- 1 tbsp salt
- ¼ cup olive oil
- 2 tbsp red wine vinegar
- ¼ cup puréed roasted garlic see note #2
- 1 cup fresh basil leaves
- ¼ cup fresh oregano leaves
Pumpkin Seed Pesto
- ½ cup toasted pumpkin seeds
- ¼ cup minced garlic
- 1 cup fresh basil leaves
- 1 cup spinach leaves
- ½ cup arugula or watercress
- ¼ cup freshly squeezed lemon juice
- 1 tsp crushed red chili flakes
- 1 tsp salt
- ½ cup olive oil plus extra as needed
- ¼ cup grated hard aged cheese like Parmesan, pecorino, Asiago or Romano
Pizza
- 2 tbsp butter
- ¼ cup + 2 tbsp olive oil divided
- 2 onions thinly sliced
- ½ lb shiitake mushrooms de-stemmed, cleaned and sliced ½ inch thick
- 2 large portobello mushrooms cleaned and diced
- ½ lb cremini mushrooms cleaned and sliced ½ inch thick
- ½ tsp salt
- Tofino-Style Pizza Dough
- 1-2 cups Red Sauce
- 1 cup Pumpkin Seed Pesto
- 3 cups shredded mozzarella cheese
- 1 cup crumbled soft goat cheese
- 2 cups baby arugula
Instructions
Tofino-Style Pizza Dough
- First mix: In a stand mixer fitted with the dough hook attachment, combine the water, yeast, beer, oil and 00 flour and mix for 5 minutes on low speed or until well incorporated. If you don’t have a stand mixer with a dough hook, you can mix the ingredients in a large bowl by hand:Use one hand to mix the dough until it forms a ball and all the dough has pulled away from the sides of the bowl. Transfer to a clean, dry work surface (marble or granite is fabulous) and knead, using the heels of your palm, for about 5 minutes, then stretch and flip. Repeat, until the dough can’t be stretched any more. Cover and let rest for 10 minutes.(Never let your dough get a crust from the air.)
- Second mix: Return the dough to the stand mixer or bowl and add the all-purpose flour and salt. Mix for 5 minutes on medium speed. If mixing by hand, it will take about 7 minutes. The dough should form a cohesive ball and pull away cleanly from the sides of the bowl. If it is too wet and sticking to the bowl, add more flour, 1 tsp at a time. If it is too dry and not all the flour is incorporated, add more lukewarm water,1 tsp at a time, until you have a smooth, shiny dough.
- Cover the bowl with plastic wrap or a plate and let rest for 20 minutes.
- Divide the dough into four pieces. One at a time, cup each piece of dough in your hand and roll it around in a circle on a clean, dry work surface until you’ve formed a smooth, round ball. Place the dough balls in a large container, spaced about 4 inches apart, to allow them room to expand.
- Seal the container tightly with its lid or plastic wrap and let the dough rest at room temperature for 1 hour. Then place in the fridge for at least 24 hours, and up to 72 hours. One hour before shaping and assembling the pizzas, remove the dough from the fridge and let it come to room temperature.
- Form the dough: Flour your hands and transfer one ball of dough to a lightly floured work surface. Sprinkle more flour onto the dough and your hands to prevent sticking.
- Starting at one side of the ball, press down with your fingertips and gently stretch it with a circular motion until it expands into a disk about6 to 8 inches in diameter. Continue massaging the dough, shaping it with your palms and fingers until the disk is about 10 inches across.Don’t worry about making a perfect circle, or making a doughy rim (aka the cornicione); this will naturally form when baking. Just go for a completely flat disk. Whatever you do, don’t overhandle the dough: be gentle with the blisters and bubbles that air will create in the crust; they will add texture and character to your final creation. Remember: no rolling pin!
- Flop the dough onto a lightly floured, perforated 14-inch pizza pan (or a regular pizza pan or an inverted baking sheet, if that’s what you have) and gently pull the edges outward, leaving some space so as not to cover the pan completely. I do this so that when transferring to and from the oven, the outer crust remains undisturbed.
- Assemble and bake: Follow each recipe’s method for assembly and baking instructions, topping your dough immediately with your desired toppings. Timing is critical here! Waiting too long before topping your stretched dough can result in dry dough.
Red Sauce
- In a food processor or a blender, purée all the ingredients to your desired smoothness (I like mine smooth enough to spread really well). Makes 4 cups.
Pumpkin Seed Pesto
- In a food processor or blender, combine the toasted seeds, garlic, basil, spinach, arugula, lemon juice, chili flakes and salt.
- Pulse until the herbs are finely chopped, then, with the food processor running, drizzle in the olive oil and blend to your desired texture (I like it smooth and creamy. If you want a thinner sauce, add a bit more olive oil). Transfer to a bowl and fold in the cheese.
Pizza
- In a medium heavy-bottomed frying pan over medium-high heat, add the butter and 2 tbsp of the olive oil. As soon as the butter melts, add the onions and turn the heat to medium-low, stirring the onions frequently to prevent them from burning, until they reach a rich, dark brown, about 20 to 30 minutes. By cooking low and slow, you are creating so much flavour, bringing out the onion’s natural sweetness without any sharp, bitter taste. If the onions start to stick or burn, turn the heat to low and add 1 tbsp water. Stir too much and the onions won’t brown; stir too little and they burn. Remove from the heat and set aside to cool.
- Heat the remaining ¼ cup olive oil in a separate medium heavy-bottomed frying pan over high heat. As soon as it starts to smoke, add all the mushrooms and cook until tender, about 5 minutes. Remove from the heat and season with the salt.
- Preheat the oven to 450°F (230°C)
- Form the dough for one pizza at a time on its floured pan.
- Once you have shaped one piece of dough, immediately spoon ¼ cup Red Sauce and ¼ cup pesto on top. Use a spatula or the back of the spoon to spread them out evenly. Sprinkle with one-quarter of the onions, ¾ cup mozzarella, one-quarter of the mushrooms, and ¼ cup goat cheese.
- Repeat the shaping and topping process with the remaining balls of dough.
- Bake for 10 to 12 minutes, until the crust is golden brown and the cheese golden.
- Remove from the oven and garnish with arugula.
Notes
#1. In Italy, flour is classified either as 1, 0 or 00, referring to how finely ground the flour is, and how much of the bran and germ have been removed. For instance, 00 flour is the most refined, similar to unbleached all-purpose/plain flour, which is a mix of hard and soft wheat, though somewhat finer. invest in a bag of Tipo 00 flour (aka doppio zero, meaning “double zero” in Italian) and fall in love (a light crust that’s crisp on the outside but tender to the bite? That’s amore). Or try the grand don, the Godflour: the Caputo 00 made from a selection of the finest grains sourced by the Naples-based Caputo family – and have been for three generations.
#2. To roast whole heads of garlic: Preheat the oven to 400°F. Using a sharp knife, cut ⅛ inch off the top of the garlic head, exposing some of the cloves inside. Lightly drizzle the garlic with 2 tbsp olive oil and wrap tightly in aluminum foil. Place the wrapped garlic on a baking dish, in a muffin pan, and roast in the oven for 20 to 25 minutes, until soft enough that you’re able to squeeze the cloves out of their skins like toothpaste. (A muffin pan works really well for this, as it keeps the garlic bulbs from rolling around.)
To roast peeled cloves: Place peeled cloves in a saucepan, cover with olive oil (about ½ tsp per clove) and simmer on low heat until fork-tender and golden brown, about 15 minutes.
To purée: Pulse the roasted cloves in a blender until smooth. (Great on sourdough!)
To store: transfer the roasted garlic to an airtight container and pour olive oil on top to fill the container. Store in a sealed container in the fridge for up to 2 weeks.