It doesn’t matter whether you have no outdoor growing space or you have acres upon acres: Microgreens give you the most bang for your buck in nutrition. They’re not complicated to grow, and they’re ready to eat in just a week (or a few weeks). But here’s the real benefit: Some types of microgreens have been found to contain four to forty times more nutrients than their fully grown vegetable counterparts.
Beyond your initial investment in seed trays and a light, the cost of growing microgreens is minimal. Seed prices vary, but you can find low-cost seeds, like salad mix, in bulk for around $10 per pound – and you won’t use anywhere near a pound of seed to fill out a tray. Add a couple of dollars for soil, and you’re spending far less than you would buying the same amount of salad mix at the store.
Microgreens Seeds
There is no difference between microgreens seeds and other garden seeds. Because you’re planting so many seeds to grow a tray of microgreens – way more than you would to grow a regular crop – bulk buying is more price efficient.
Microgreens Soil
You don’t need anything too special for a microgreens soil mix. Because microgreens are plants that don’t go through a complete growth cycle, having a nutrient-heavy growing mix is less essential here than in growing full-sized crops. Fine-grained potting medium works great. Avoid large particles in your microgreens soil, because those are hard for small plant roots to reach around. We’re looking for dense, even seedling growth throughout the tray, and a fine-grained mix makes it as easy as possible for that to happen. Potting mix with wood products and growing mediums marketed as garden soil generally won’t work here. “Soil” is not even necessary in your microgreens growing mix. Hemp and coconut coir mat are both doable. I’ve tried soil-less media like this and found the microgreens’ flavour a bit lacking, so test this out for yourself.
Microgreens Lighting
You can use various lighting technologies. If you don’t have grow lights already, read Epic Gardening’s online guide to determine which kind is right for you.
Microgreens Start-Up
Materials
- Soil mix
- 1020 seed tray (draining)
- 1020 bottom tray (non-draining)
- Seeds of your choosing
Planting Instructions
1. Put 2 cups (473 ml) of water in the seed tray. The water will wick into the soil mix in the next step. Watering from the bottom helps to prevent the fungal issues that can crop up when watering from the top.
2. Add soil mix to the seed tray. Fill the tray to within 1/4 to 1/2 inch (0.6 to 1.3 cm) of the top. This will make it easier to harvest without getting your shears dirty.
3. Lightly compress the soil. Place an empty seed tray on top of the one you just filled, and tap on the empty tray to lightly tamp down the soil beneath it. Smooth out any indents in the soil. Compacting the soil just slightly like this gives the seeds a stable soil base to adhere to, which will help germination. Remove the empty seed tray on top.
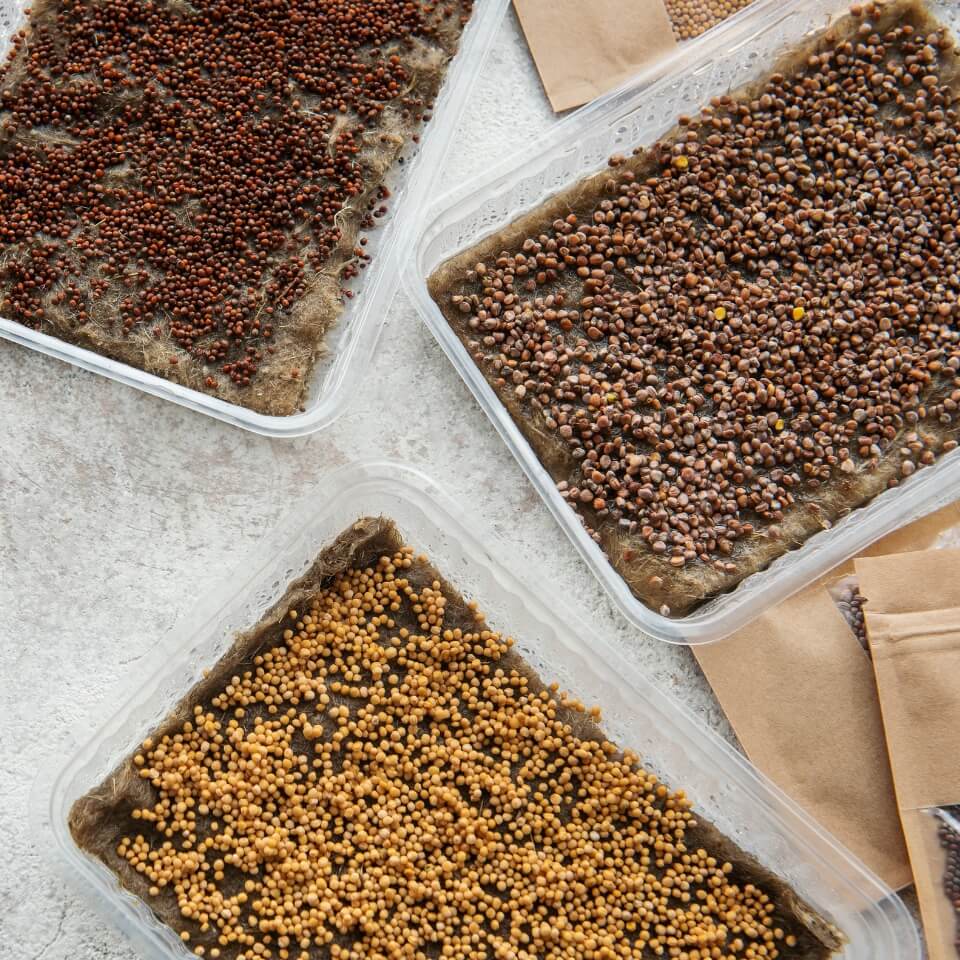
4. Seed your tray. Seed just one type of microgreen per potting soil-filled tray. Sprinkle seeds evenly over the top of the soil more densely than you’d ever imagine seeding in a garden. Work from corner to corner, being sure to get seeds across the whole surface. Avoid large clumps of seed.
5. Mist with water. A light watering from the top helps the seed adhere to the surface of the soil and trigger germination. Use a spray bottle on the mist setting to just get the surface wet.
6. Place an empty tray on top. Most seeds don’t need light to germinate. Because we’re sowing seeds on top of the soil, the darkness and the weight of the tray simulates the conditions of seeds being covered in soil. Putting a little more weight on top forces the seeds to struggle a bit in germination, so they’ll grow stronger than if they were just left to germinate with no outside force. Put the prepared seed tray on the bottom tray.
7. Check for germination. Every day or two, look under the top tray for signs of germination. The seeds will push up from the soil and may push up the tray, too. You’ll see yellowylooking stems and know it’s time to remove the top tray.
8. Put them under lights. Microgreens respond very quickly to light, turning from yellow to bright green in a day.
9. Water when necessary. Give your trays a lift every few days, and if they’re feeling light, heavily mist them with water again.
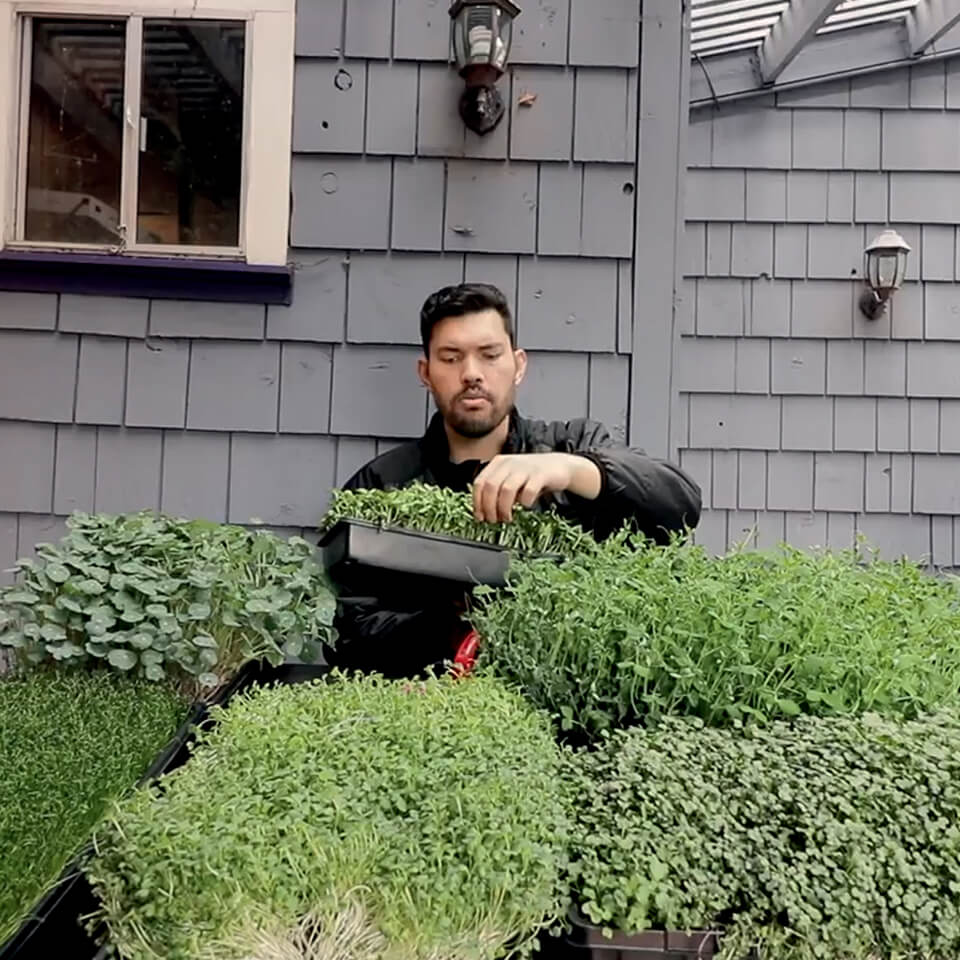
10. Harvest. You’ll have microgreens ready to eat in eight days to one month, depending on the variety. Harvest when they’re a few inches long using sharp scissors or small grass shears. Grab the top of the microgreens, cut about 1 inch (2.5 cm) above the soil line, and put them in a bowl. Be careful not to get the blades in the soil.
11. Store your microgreens. Pea microgreens store well in a mesh produce bag. Others do well in closed plastic bags. Store microgreens bags in a high-humidity crisper. It’s best to use your harvest as fresh as possible – within 3 to 5 days, ideally – for best taste and nutrient density. Wash microgreens just before you use them.
12. Clean up your tray. Most microgreens are finished after one cutting. Your spent microgreen medium and roots are great additions to vermicomposting and hot composting bins.
Tip: How often do we, with the best intentions, not set a timer because we’re sure we’ll remember when it’s time to do something? From taking laundry out of the washing machine to checking herbs on the dehydrator, we’ve all made this mistake. Set a timer on your phone when soaking microgreens seeds prior to planting. I recommend soaking them for several hours to overnight, depending on the variety. If you leave them to soak too long, they can rot, and then you’ve wasted a lot of valuable seed.
My Favourite Microgreens
Wheatgrass
Wheatgrass is a popular microgreen for juicing. The seed has a hard seed coat and needs to be soaked for 6 to 12 hours before seeding for good germination. Use 8 ounces (227 g) of seeds per 1020 tray. Wheatgrass microgreens grow very quickly – 1 inch (2.5 cm) or more a day – and are ready to harvest fast. These are one of the only microgreens that you can cut and come again, meaning you can harvest from the same plants more than once by letting them regrow.
Arugula
Baby or micro-arugula is super flavourful – a quick and easy way to add a bit of a peppery taste to salads. You want just 1/4 ounce (7 g) of seeds to cover a 1020 tray, no soaking required.
Dunn Peas
Pea microgreens are so tasty. Soak these seeds for 4 hours before sowing. Give them space in their soaking bowl, because they’ll end up absorbing water and swelling a lot. You need 5 to 8 ounces (142 to 227 g) per 1020 tray.
Black Oil Sunflower Seeds
There are hundreds of types of sunflower seeds. Black oil sunflowers are the best for microgreens. Soak 8 ounces (227 g) of seeds for 4 hours. The colder the water, the better for sunflowers. As the sunflowers grow, their hulls will stay on the leaves until you brush them off. This is an extra step you have to take before harvest, because eating the hulls on the sunflower shoots isn’t appetizing.
Salad Mix
Salad mix microgreens are super easy. They come in different varieties, so you can get a spicier mix, with mustards and arugulas, or a milder mix that’s heavier on lettuces. Seeding rate depends on the varieties in the mix – let’s say it’s around 1/2 ounce (14 g) of seeds per 1020 tray – and these don’t need soaking.