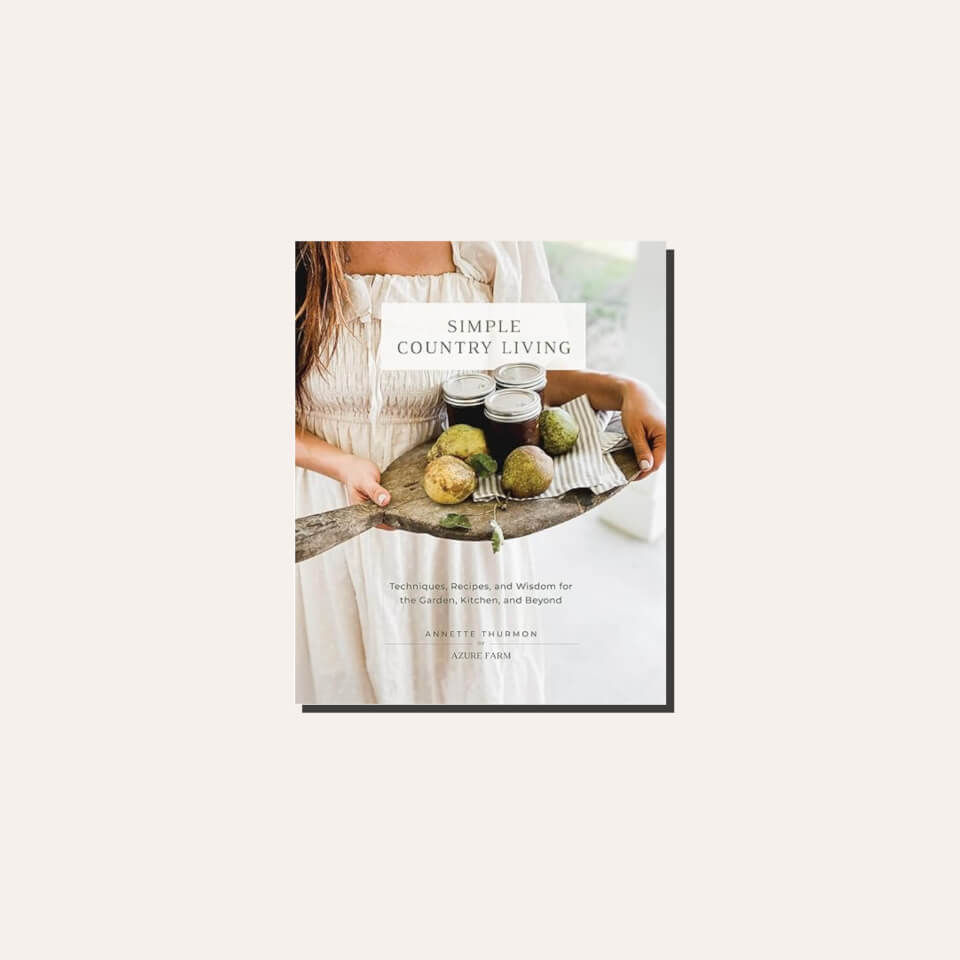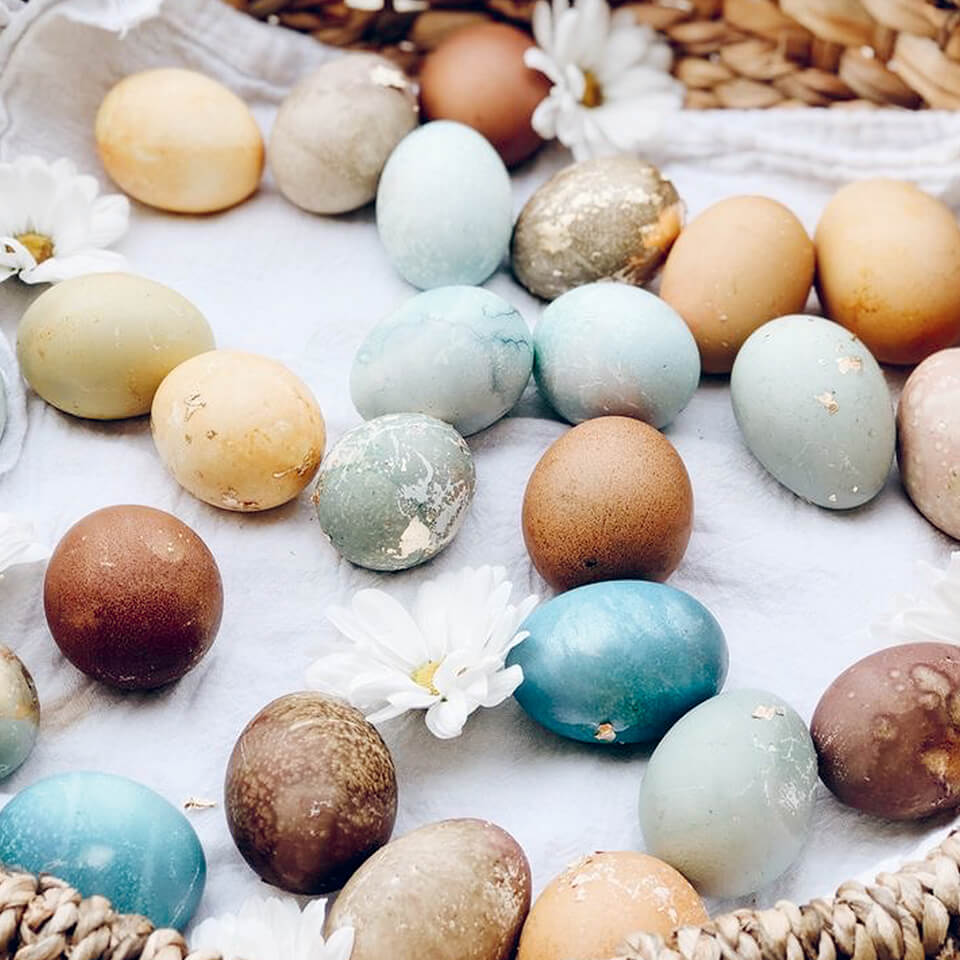
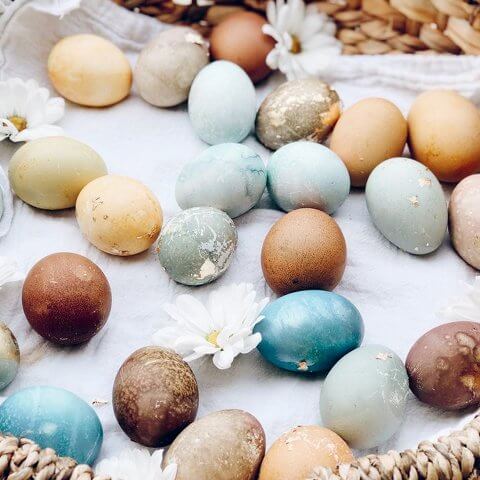
In Simple Country Living: Techniques, Recipes, and Wisdom for the Garden, Kitchen, and Beyond , Annette Thurmon takes readers behind the scenes at her homestead on Azure Farm in Georgia. Gardening tips and family-favourite recipes fill the pages, as to how-tos for seasonal activities – like how to dye Easter eggs. Thurmon uses ingredients she already has on hand to dye white and brown eggs naturally. The natural dyes are made from ingredients Thurmon has on hand, and the results are Easter eggs in beautiful springtime colours.
One of the most popular questions about dyeing Easter eggs naturally is: Can you dye brown eggs for Easter? Yes you can – but the dyes you use will create different colours dependent on whether the you’re dyeing a white egg or brown egg.
Natural dye ingredients for coloured white eggs
- Purple cabbage makes blue dye
- Red onion skins make light purple dye
- Yellow onion skins make orange dye
- Shredded beets make pink dye
- Ground turmeric makes yellow dye
- Hibiscus teamakes lavender dye
Natural dye ingredients for coloured brown eggs
- Purple cabbage makes green dye
- Red onion skins make red dye
- Yellow onion skins make rust red dye
- Shredded beets make maroon dye
Natural Easter Egg Dye
Equipment
- large stockpot
- ingredients for one colour of your choice see ingredients list
- fine-mesh strainer
- baking dish or another container
- paper towels
Ingredients
- 12 white or brown unpeeled hard-boiled eggs at room temperature (do not use raw eggs)
Natural dye colours
- 4 cups (360 g) chopped purple cabbage to produce blue on white eggs or green on brown eggs
- ¼ c cup white distilled vinegar
- 4 cups (4 g) red onion skins to produce lavender on white eggs or red on brown eggs
- 4 cups (4 g) yellow onion skins to produce orange on white eggs or rusty red on brown eggs.
- 4 cups (900 g) shredded beets to produce pink on white eggs or maroon on brown eggs
- ½ cup (54 g) ground turmeric to produce yellow on white eggs
- 4 standard-size tea bags of pure hibiscus tea to produce lavender on white eggs
Instructions
- In a large stockpot, place the ingredient for the colour you want and add enough water to cover it by 1 inch (2.5 cm).
- Bring this to a boil over high heat, then reduce the heat to medium-high. You want the water to stay lively without boiling over.
- Boil for about 1 hour, stirring occasionally to make sure nothing sticks to the bottom.
- Let everything cool to room temperature, then pour it through a strainer and into a deep baking dish. Discard the boiled material.
- Add ¼ cup (60 ml) of vinegar to the dye.
- Add the eggs to the dye, taking care not to crack them.
- Leave the eggs in for at least 1 to 2 hours and up to 24 hours, because they will not darken right away. You can take some out at different times. I usually keep some in for 1 to 2 hours, some for 3 to 4, and some for the whole 24 hours.
- As you remove each egg, pat it dry with a paper towel. The colours, especially the deep blues, will continue to develop.
Notes