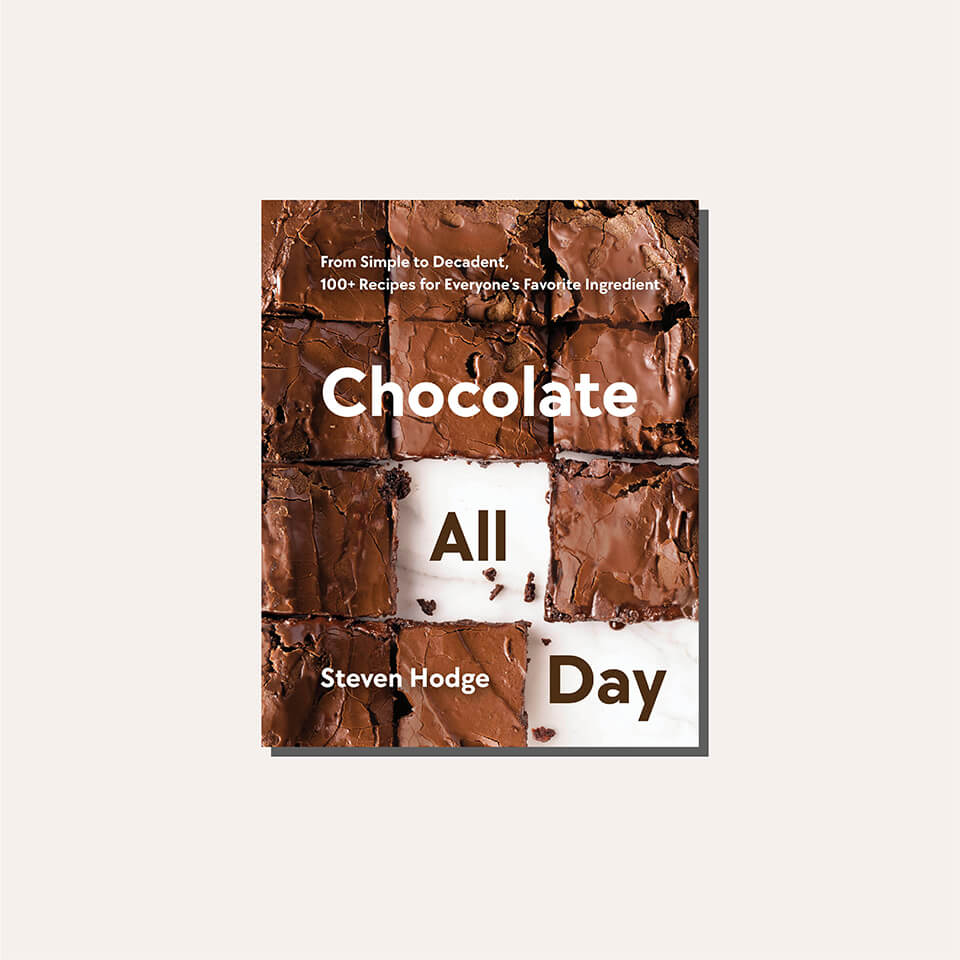
As a Canadian chocolatier and pastry chef, Vancouver’s Steven Hodge was all-but-obligated to create a recipe for chocolate butter tarts – and he shares just that in his book Chocolate All Day: From Simple to Decadent, 100+ Recipes for Everyone’s Favorite Ingredient. “If you have never had a classic butter tart, this recipe is a must-try. It hits all the taste buds, and it’s so easy to make,” Hodge writes. Like all butter tarts, his are made with a filling of butter, sugar, syrup and egg – Hodge also adds raisins, which many Canadians prefer to leave out, and dark couverture chocolate. “These tarts are unbelievably gooey, buttery and flaky – a perfect treat for those with a sweet tooth. I like to use a French brisée dough for a buttery, flaky pastry, but regular pie dough is fine as well. You’ll see that I use raisins, but if you’re not a fan, try pecans (or nothing) in the filling.”

Chocolate Butter Tarts
Ingredients
Brisée Dough
- 1½ cups (340 g) unsalted butter cold
- 1¾ cups + 4 tsp all-purpose flour
- 1 tbsp kosher salt
- ⅓ cup cold water
Filling
- 6.7 oz (190 g) dark couverture chocolate
- ⅔ cup dark brown sugar
- ¼ cup (60 g) unsalted butter room temperature
- ¾ tsp vanilla extract
- ¼ tsp kosher salt
- 2 large eggs
- 3 tbsp heavy cream
- 6½ tbsp maple syrup
- ½ cup raisins
Instructions
- For the dough, place the butter in the freezer for 10 minutes to firm up. Then grate the butter into a bowl and place in the fridge while you measure the other ingredients.
- Combine the flour and salt in a food processor. Add the chilled grated butter. Pulse for a few seconds and then add the water. Continue to pulse until the dough comes together slightly. Remove from the food processor and hand-knead to bring it all together. Do not overwork the dough; it’s okay if some of it flakes off. Pat the dough into a square about 2 inches thick. Wrap with plastic wrap and place in the fridge to relax for 30 minutes.
- While the dough is relaxing, start the tart filling. Preheat the oven to 350°F.
- Melt the chocolate in a microwave (see note #1) and set aside. In the bowl of a stand mixer fitted with the paddle attachment, cream together the brown sugar, butter, vanilla and salt, until light and fluffy.
- Beat in the eggs, then the cream and maple syrup, followed by the raisins. Add the melted chocolate and stir to fully combine. Set aside in the fridge until you are ready to use (see note #2).
- Take the brisée dough out of the fridge and lightly dust the dough and your work surface with flour. Roll out the dough to ⅒ inch thick. Using a 4½-inch cookie cutter, cut out rounds.
- Spray a standard-sized muffin tin with nonstick spray, then line the wells with the brisée rounds. Leave about ¼ inch of dough above the rim. Place the muffin tin in the freezer for 10 minutes to relax the dough, so it does not shrink when baking.
- Take the filling out of the fridge and give it a stir to reincorporate. Remove the lined muffin tin from the freezer and fill the tarts, using a 1-ounce ladle or #30 black (1 oz) ice-cream scoop.
- Bake the tarts in the preheated oven for 20 minutes. Let cool completely, then remove from the muffin tin.
Notes
-
To melt chocolate in the microwave, place chocolate pieces in a heat-proof, microwave-safe bowl, being sure not to fill it more than one-quarter full. Start your microwaving with 30 seconds at medium power. Remove the bowl from the microwave and give the chocolate a stir. Continue to micro- wave and stir in 15-second increments until all the pieces are melted. If you have a few stubborn pieces left near the end of the process, you can move to increments of 3 to 5 seconds to ensure that you don’t burn the chocolate.
- The filling can keep for up to 1 week in the fridge. It will separate as it sits, so before using it, always give the mixture a good stir.
More chocolate recipes from Steven Hodge
Steven Hodge's recipe for decadent chocolate martinis made with Japanese vodka and white crème de cacao.
Get the recipe

Steven Hodge's recipe for decadent chocolate martinis made with Japanese vodka and white crème de cacao.
Get the recipe

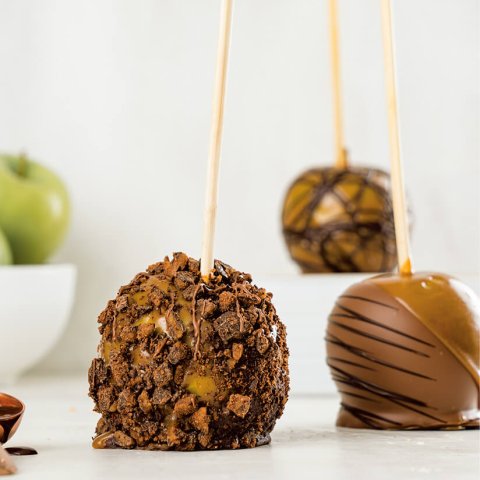
Steven Hodge's recipe for crunchy Granny Smith apples dipped in caramel and tempered milk chocolate.
Get the recipe
Steven Hodge's recipe for crunchy Granny Smith apples dipped in caramel and tempered milk chocolate.
Get the recipe
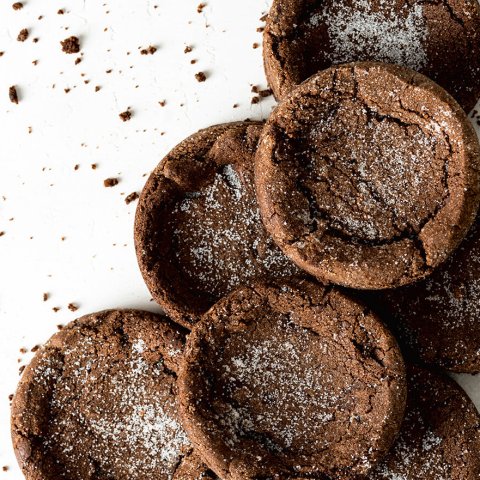
Chocolate chunks and orange zest are the best part of these moist triple-chocolate chookies.
Get the recipe
Chocolate chunks and orange zest are the best part of these moist triple-chocolate chookies.
Get the recipe